Friday, December 30, 2016

Goodbye 2016

As we reflect upon the year that was, the good and the not so good:

"Look back upon God's faithfulness to trust Him for the journey ahead."


I have been playing around with my new Albrecht Durer watercolour pencils and Polychromos coloured pencils.


I worked over gessoed fabric which gave quite a slick surface. The Polychromos pencils actually became water soluble on the gesso!
The hair was created with torn strips of fabric.

Thank you so much for visiting my blog this year. I pray you will have a blessed 2017 with much love, joy and creativity. 

HAPPY NEW YEAR!

Thursday, December 29, 2016

Feather and Seeds

Today I have more lessons to share from Life Book 2015.


We had a lesson in Week 5 by Rachael Rice to create a dream catcher.


Lots of texture and dimension on this piece.


In the same week we were lucky enough to have a bonus lesson by Tam to create this lovely Affirmation Feather.


In Week 6 Tam taught us how to create some abstract art called Seeds of Love. This one was all about the use of colour.
If you would like information about Life Book 2017 and a 20% discount code click the link in my side bar.
I hope you have enjoyed my trip down Life Book memory lane as much as I have enjoyed sharing it with you.


Wednesday, December 28, 2016

Life Book Lessons

I have enjoyed pulling out and browsing through my old Life Book lessons.
Here are two more lessons from Life Book 2015.


The first one was from Week 3 by lettering guru Joanne Sharpe.


I love Joanne's wonderful whimsical style and use of water colour.


The second lesson was from Week 4 by Patti Ballard.


This was a very different style for me. I loved making this piece and being pushed out of my comfort zone.

Life Book 2017 starts on the 1st January. For more information and a 20% off code click the link in my side bar.
Hope you are being inspired to create.

Life Book - Beacon of Light

Today I am sharing the first lesson from Life Book 2015 by Tamara Laporte.


We started with a warm up piece using water soluble crayons and acrylic paint.


I added cute little pocket to hold Scripture verses.


Our main art consisted of a whimsical little girl called Beacon of Light. I collaged a copy of Proverbs 31:10-31 (The Wife of Noble Character) to her dress.


She was created using water soluble crayons and acrylic paint. I really love Tam's whimsical painting style.
For more information about Life Book 2017 and a 20% off code click the link in my side bar.
I'll be back tomorrow to share some more 2015 work.

Monday, December 26, 2016

Life Book 2017 commences soon!

I love new beginnings. The new year is just around the corner and so is Life Book 2017! It all begins January 1st and continues the whole year. I can't wait.
In the meantime here is the lesson from Week 37 this year taught by Angela Kennedy.


I loved learning this technique of coloured pencil over acrylic paint.


I love that you can see the texture of the water colour paper shining through on her wistful little face.

If you are interested in joining us for Life Book 2017 click on the link in my side bar for more information and a 20% discount code.
Hope you are finding some creative time during this busy season.

Sunday, December 25, 2016

Merry Christmas

Our Artsy Advent Calendar adventure has come to an end and I have so enjoyed the journey.
This was my final entry.


This is my completed calendar.


May your Christmas be truly blessed.

Tuesday, December 13, 2016

Artsy Advent Calendar - Progress

We are just over half way through our Artsy Advent Calendar adventure.
There is some lovely work over on Instagram#ArtsyAdventCalendar.
Here is mine so far.


I am having so much fun creating this project.
For close up pictures check out my Instagram link in the side bar.
I hope you are able to take some time to enjoy this wonderful season.

Monday, December 5, 2016

Summer Is Here - Watercolour

December ushers in summer here in Australia. We have had some very hot days already. I'm hoping we will be able to go to the beach in the holidays soon.


I have used my Winsor & Newton Cotman Watercolours.
Hope your are able to make the best of the weather in whatever part of the world you live in.

Friday, December 2, 2016

ArtsyAdventCalendar - Day 1 - Watercolour

The countdown to Christmas has begun!
Andrea Gomoll from Creative Creations has designed a wonderful Advent Calendar containing 24 small daily sketches. She is also posting a daily video of her creations so we can play along and create our own ArtsyAdventCalendar. If you would like to play along with us just click the link in my side bar. 
For day one Andrea created a cute little whimsical elf which I love. I wanted to keep a Christian theme to my calendar so here is my day one sketch, keeping first things first.


I have used my Winsor & Newton Cotman Watercolour set. I have used Andrea's technique of colouring the image and then using a black fine tip marker to create a sketchy outline. I really love this look.


You can't really see it but my advent calendar consists of 24 different sized circles, randomly placed like Andrea's with smaller ones (baubles) in between.  

If you would like to check out Andrea's calendar click on the link in my side bar.

If you would like to check out my daily progress you can follow me on Instagram. The link is also in my side bar. 

I will also share my progress from time to time here on my blog.

Thanks for stopping by :)

Tuesday, November 29, 2016

Friends - Watercolour (Life Book 2016)

Week 35 was a fun lesson on Life Book as it was a collaboration between Tam and Jane Davenport. The challenge was to use limited supplies.


The girl on the left is Jane's girl, typical of her wonderful style of long neck and flowing hair. She taught us to sketch in ballpoint pen!! I was a bit nervous at first but it ended up being a really freeing exercise, accepting how she "fell out of the pen" as Jane would say.
The girl on the right is Tam's girl, also in her typical whimsical style. She was sketched in pencil first and then gone over with ballpoint pen.

This lesson was so much fun, learning from two amazing teachers at the same time. It was also a little extra special for me as it was filmed while Tam was visiting Jane here in Australia.

If you would like information about Life Book 2017 and a 20% discount click here.
Thanks for stopping by.

Wednesday, November 23, 2016

Peace - Silk Ribbon Embroidery and Copics

"Peace I leave with you; my peace I give you. I do not give to you as the world gives. Do not let your hearts be troubled and do not be afraid." 
John 14:27

I haven't been able to put my Copics away quite yet. I made a card for my husband's cousin so I thought I would also enter it into the PaperArtsy Alcohol Inks and Pen Challenge.

I was inspired by the beautiful silk ribbon embroidery of craftyattic.com.


All the tutorials for these flowers can be found on the craftyattic.com website here.


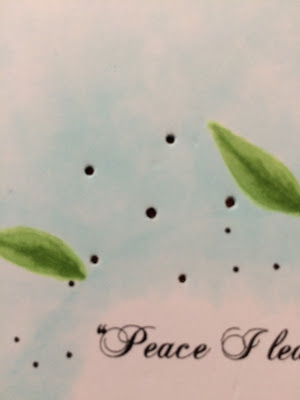
I began by printing scripture in an oval. I made two to take advantage of the whole page. Using a marker I positioned my flowers and leaves around the oval. I then printed out my scripture again on X-Press It Blending Card after removing the oval border on my computer.


I transferred the flower dots of my design to the blending card using the Copic Multiliner Pen and Copic markers for the oval and leaves.


I coloured the leaves first using YG13 and YG17. I lightly coloured the background using B000 and the blender pen. I also ran B000 around the edge of the topper and card.


I pierced the dots making small holes using a paper piercer. This makes it easy to pass the needle through the card.


I coloured the flowers using my Copic markers by just lightly touching the silk ribbon and allowing the colour to bleed and spread. I learned this technique from craftyattic.com. I just used Copic markers instead of Promarkers and card instead of fabric.

The colours I chose are:
Yellow: Y32 and Y35.
Violet: V12 and V15.
Pink: RV11 and RV13
Blue: B00 and B02.

The little tendrils I drew with coloured pencils to keep the soft look of the card.
I have so enjoyed this challenge by PaperArtsy and discovering the versatility of alcohol markers.

Sunday, November 20, 2016

I Am The Vine - Copics

I have a confession to make. I invested in some Copic markers many years ago and until now I haven't really used them. I was inspired to take them out and have a bit of a play to participate in the challenge over on the PaperArtsy blog - Alcohol Ink and Markers. Darcy has a link to Kimberly Brown's YouTube Channel. She has some great tutorials using mostly Pro-markers that inspired me to take out my Copics and have a go. 
I have also been wanting to try Zentangle® Inspired Art (ZIA for short) after being inspired by Norma J Burnell's fabulous ZIA Fairies. You can check out her beautiful work on her blog Fairy Tangles. I based my girl on her tutorial in a book I picked up called "The Art of Zentangle®".


This book contains lessons from four Certified Zentangle® Teachers and takes you through a range of tangles step by step.
To learn more about Zentangle® you can visit the website here.


I began with a pencil sketch and transferred my design to X-Press It Blending Card using a Copic Multiliner pen. It is very important to use a pen which is Copic proof or it will bleed when the marker comes into contact with it. I also used the very tip of the chisel of my lightest skin tone coloured marker to avoid a harsh black line around the face and neck. I also lightly coloured the the irises and lips.


To choose my colours I used my colour wheel. I highly recommend it if you are a bit colour challenged like me. I knew I wanted to use Yellow/Green as it was my eye colour so my triad colour scheme included Red/Orange and Blue/Violet. A bit different for me.

If you are interested these are the colours I chose: 
Skintone: E000, E00, E51 and E01 for the subtle blush on the cheeks.
Red/Orange: E95, E97, E99.
Yellow/Green: YG93, YG95, YG97.
Blue/Violet: BV00, BV02, BV04 and BV0000 for the background.
Vine: E31, E35, E37.


This is my finished coloured image. I had to practice my blending a lot before I began, particularly the skin tone. A bit streaky but I'm sure I will improve with more practice.
I coloured the background in a very pale shade of Blue/Violet.


In her tutorial, Norma suggests using small dots with her graphite shading. I have also used it here over the Copic shading and I like the effect. I coloured some rhinestones with my markers for some added bling. I have added a hint of glitter gel pen around the flower to bring it forward.


I have used coloured pencil for eyeshadow, lip detail and to deepen the neck shading. White gel pen was used for the highlights.
Something I learned the hard way: do not take the lid off your marker over your art work or you too will enjoy splatters, I mean beauty spots, over your freshly coloured face. Lesson learned:)
I found this art work to be so relaxing and I enjoyed it so much I definitely will be doing some more colouring in the near future. 
Thank you PaperArtsy for providing this challenge.

Thursday, November 17, 2016

Life Book - When One Door Closes

Sometimes God will close a door and sometimes it can cause us some grief. However, rather than lament the end of a season we should instead recognize and rejoice in the beginning of a new season.

Our Life Book lesson for week two this year was provided by Ivy Newport.


We had fun learning a paint over collage technique. All of images including the words (except the Bible verse) came from magazines.


It was great to have a base to work on. The shading was already there.


If you would like more information about Life Book 2017 and a 20% discount click here.

I hope your day is filled with love, peace and joy.

Wednesday, November 16, 2016

Life Book 2017 - Open for registration


Life Book 2017 is now open for registration with a 20% discount.

If you are new to Life Book let me tell you a little about it.
I have been a student of Life Book in 2013, 2015, 2016 and will be in 2017.
Life Book is a year long mixed media art class. Tamara Laporte hosts Life Book and provides not only her own beautiful whimsical art lessons but also lessons from many other teachers as well. Each of the teachers provide varied art lessons each unique to their own style.

I am a relative newbie to the art scene and most of the skill I have learned so far has been from Life Book. I have loved receiving new art lessons each week in the form of  downloadable videos and PDFs. There is no pressure to keep up. You complete as much or as little as you choose. At the end of the year we get to bind all of our art work into a book.

There are at times references to alternative or "new age" symbols. I choose to tailor the lessons to my own Christian perspective and I personally have had no problem doing that. God's Word is my greatest inspiration in life and I have found that I have not only grown in my art skills but also in my faith.

Click here for more information about Life Book 2017 and to receive your 20% off.

Over the next few weeks I will be showing you some examples of some of the work I have done in the past to give you an idea of some of the lessons.

This was the first class in January this year by our host Tamara Laporte.

Tam always begins the year with a warm up lesson.


Here is the main lesson.

I enjoyed creating this lesson using animals and symbols to represent things we would like to take with us on our journey this year.


The owl represents wisdom.


The horse represents strength.


The elephant represents patience. 
Overarching all of these things is of course the Bible, a compass for this life's journey.


The Bible is actually interactive, opening to reveal some of my favourite Bible verses.


This lesson was so much fun in Tam's classic whimsical style.

I hope you will consider joining me on the Life Book 2017 journey. I can hardly wait.

Saturday, November 12, 2016

Wisdom

"The fear of the Lord is the beginning of wisdom"
Proverbs 9:10

I have heard it said that wisdom is knowledge rightly applied. However we can't apply knowledge we don't have. Having a reverential fear of the Lord leads us to spend time in the source of all knowledge, God's word to us, and gives us the foundation for the development of wisdom.
The benefits of wisdom are far beyond our imagination. Check it out in Proverbs for yourself.


I have used Gelatos and coloured pencils on water colour paper primed with gesso.


I love these verses found in Proverbs 8:22-31. 
I printed them onto tissue paper (with waterproof ink) and collaged them to the front of the dress. I also printed out various verses pertaining to wisdom and collaged them around the background. I love the way the tissue paper disappears into the background.


The title "wisdom" I stenciled across her hair line using a black gel pen through a letter stencil.
I also added some Whipped Spackle through a stencil in the backgound.

I am entering this art work into the PaperArtsy #21 Challenge - Typography, Fonts and Quotes. There are some wonderful examples of the various ways typography, fonts and quotes can be used in your art work. Check out the link for some great inspiration. 
I particularly liked this hand lettering by Valerie Sjodin, very inspirational.